After publishing the article about creating complex content elements, is time to create a simple content element. This content element will not have its own tables like the previous article. It will use tt_content's columns. This article will not be as detailed so if you need some explanations visit the first article. Meaning that there will be no breaking downs unless neccessary.
This article addresses interators who have enough experience with TYPO3 and creating extensions. New integrators might find it a little bit harder, but i am going to do my best to make you understand how everything works. With no further ado let's begin.
CONCEPT
The content element will be a common header with an image and text and it will be based on the Foundation Zurb Framework.
Base extension
We first need a base extension to work with. If you haven't yet or you do not know how to create one, then follow the article below to understand what a base extension is, why you need one and how to create it.
Create a base extension
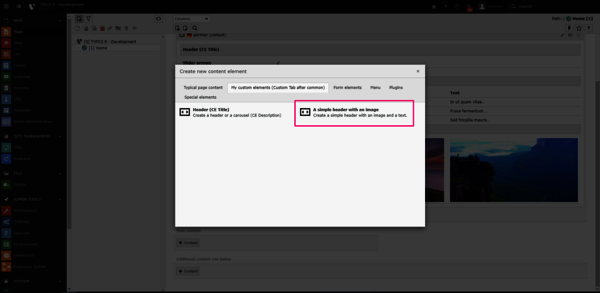
Step 1: Add the content element on the list
Under the: your_extension_key/Configuration/TSconfig/Page/CustomElements.typoscript you will have to add your content element in the list:
                mod.wizards.newContentElement.wizardItems.ownContentElements{
   header = LLL:EXT:your_extension_key/Resources/Private/Language/locallang.xlf:my_custom_elements
   after = common
   elements {
       simple_header{
           iconIdentifier = HeaderWithTitle
           title = LLL:EXT:your_extension_key/Resources/Private/Language/locallang.xlf:simple_header.title
           description = LLL:EXT:your_extension_key/Resources/Private/Language/locallang.xlf:simple_header.description
           tt_content_defValues {
               CType = simple_header
           }
        }
    }
    show := addToList(simple_header)
}
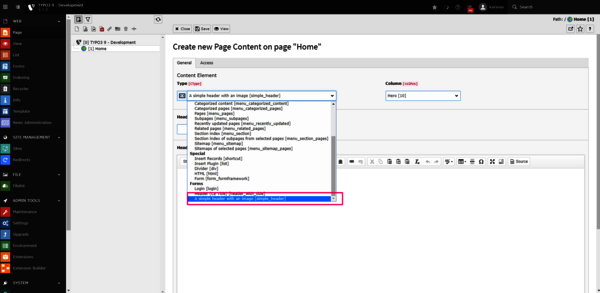
Step 2: Add the content element on the dropdown list
Under the: your_extension_key/Configuration/TCA/Overrides/tt_content.php you will have to add the content element into the dropdown list:
                \TYPO3\CMS\Core\Utility\ExtensionManagementUtility::addPlugin(
       array(
          'LLL:EXT:your_extension_key/Resources/Private/Language/locallang.xlf:simple_header.title',
          'simple_header',
          'EXT:your_extension_key/Resources/Public/Icons/ContentElements/header_with_title.svg'
       ),
       'CType',
       'your_extension_key'
);
Step 3: Create the columns
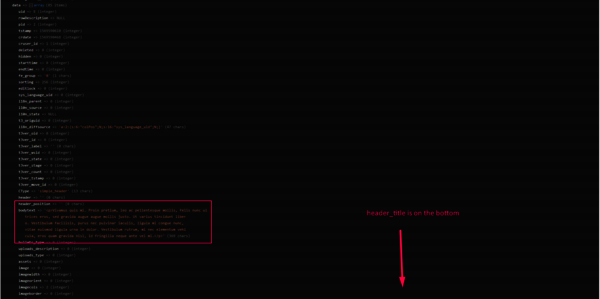
Under the: your_extension_key/ext_tables.sql you will have to add the columns that are going to be used to store the information. If you add an element on the website, any element, it will be saved in the tt_content table. Note: The following columns already exist on tt_content but i will create new columns only for the sake of this tutorial. I will though use the column bodytext to combine the possibilities of having a new column and using an existing column.
For example:
The header title could be the header column in tt_content which already exists. I will create a new one though.
The header image could be the media column in tt_content which already exists. I will create a new one though.
The header text could be the bodytext column in tt_content which already exists. I will use it the way it is.
                CREATE TABLE tt_content (
	header_image int(11) unsigned DEFAULT '0',
        header_title varchar(255) DEFAULT '' NOT NULL,
);
Step 4: Create the TCA
Under the: your_extension_key/Configuration/TCA/Overrides/tt_content.php you will have to add the configuration for content element via the TCAs.
                $extra_fields = [
	'header_title' => [
		'exclude' => true,
		'label' => 'LLL:EXT:your_extension_key/Resources/Private/Language/locallang.xlf:header_title',
		'config' => [
			'type' => 'input',
			'size' => 30,
			'eval' => 'trim'
		],
	],
	'header_image' => [
		'exclude' => true,
		'label' => 'LLL:EXT:your_extension_key/Resources/Private/Language/locallang.xlf:header_image ',
		'config' => \TYPO3\CMS\Core\Utility\ExtensionManagementUtility::getFileFieldTCAConfig(
			'header_image',
			[
				'appearance' => [
					'createNewRelationLinkTitle' => 'LLL:EXT:frontend/Resources/Private/Language/locallang_ttc.xlf:images.addFileReference'
				],
				'overrideChildTca' => [
					'types' => [
						'0' => [
							'showitem' => '
                                --palette--;LLL:EXT:lang/locallang_tca.xlf:sys_file_reference.imageoverlayPalette;imageoverlayPalette,
                                --palette--;;filePalette'
						],
						\TYPO3\CMS\Core\Resource\File::FILETYPE_TEXT => [
							'showitem' => '
                                --palette--;LLL:EXT:lang/locallang_tca.xlf:sys_file_reference.imageoverlayPalette;imageoverlayPalette,
                                --palette--;;filePalette'
						],
						\TYPO3\CMS\Core\Resource\File::FILETYPE_IMAGE => [
							'showitem' => '
                                --palette--;LLL:EXT:lang/locallang_tca.xlf:sys_file_reference.imageoverlayPalette;imageoverlayPalette,
                                --palette--;;filePalette'
						],
						\TYPO3\CMS\Core\Resource\File::FILETYPE_AUDIO => [
							'showitem' => '
                                --palette--;LLL:EXT:lang/locallang_tca.xlf:sys_file_reference.imageoverlayPalette;imageoverlayPalette,
                                --palette--;;filePalette'
						],
						\TYPO3\CMS\Core\Resource\File::FILETYPE_VIDEO => [
							'showitem' => '
                                --palette--;LLL:EXT:lang/locallang_tca.xlf:sys_file_reference.imageoverlayPalette;imageoverlayPalette,
                                --palette--;;filePalette'
						],
						\TYPO3\CMS\Core\Resource\File::FILETYPE_APPLICATION => [
							'showitem' => '
                                --palette--;LLL:EXT:lang/locallang_tca.xlf:sys_file_reference.imageoverlayPalette;imageoverlayPalette,
                                --palette--;;filePalette'
						],
					],
				],
				'maxitems' => 1
			],
			$GLOBALS['TYPO3_CONF_VARS']['GFX']['imagefile_ext']
		),
	],
	'bodytext' => [
		'exclude' => true,
		'label' => 'LLL:EXT:your_extension_key/Resources/Private/Language/locallang.xlf:.bodytext',
		'config' => [
			'type' => 'text',
			'enableRichtext' => true,
			'richtextConfiguration' => 'full',
		],
	],
];

\TYPO3\CMS\Core\Utility\ExtensionManagementUtility::addTCAcolumns(
	'tt_content',
	$extra_fields
);
\TYPO3\CMS\Core\Utility\ExtensionManagementUtility::addToAllTCAtypes(
	'tt_content',
	'header_title, header_image'
);

$GLOBALS['TCA']['tt_content']['types']['simple_header'] = [
	'showitem' => '
		--div--;LLL:EXT:core/Resources/Private/Language/Form/locallang_tabs.xlf:general,
		  --palette--;LLL:EXT:frontend/Resources/Private/Language/locallang_ttc.xlf:palette.general;general,
			header_title, bodytext, header_image,
		--div--;LLL:EXT:frontend/Resources/Private/Language/locallang_ttc.xlf:tabs.access,
			starttime, endtime
	'
];
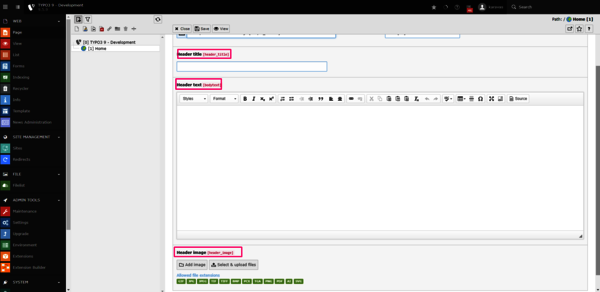
What this does it to create the configuration for the header_title, header_image and CHANGE the configuration of the bodytext. Since it already exists TYPO3 won't create it.
Then three essential steps are performed:
- first the columns are actually added to the table by using \TYPO3\CMS\Core\Utility\ExtensionManagementUtility::addTCAcolumns().
- then the fields are added to the “types” definition of the “tt_content” table by using \TYPO3\CMS\Core\Utility\ExtensionManagementUtility::addToAllTCAtypes().
- the backend inputs are defined and their sequence by using the $GLOBALS['TCA']['tt_content']['types']['simple_header']
Step 5: Displaying the content in FrontEnd
Now that the configuration is ready, we can display the content in the FrontEnd. At this point TYPO3 knows that a content element is registered, configured etc. But it doesn't know how to bring the content into the FrontEnd. We need to define a way so TYPO3 will be able to achive that. DataProcessing does just that.
                tt_content   {
	simple_header < lib.contentElement
	simple_header {
		templateRootPaths.10 = EXT:your_extension_key/Resources/Private/Templates/ContentElements/
		partialRootPaths.10 = EXT:your_extension_key/Resources/Private/Partials/ContentElements/
		templateName = SimpleHeader.html
		dataProcessing {
			370 = TYPO3\CMS\Frontend\DataProcessing\FilesProcessor
			370 {
				references.fieldName = header_image
				as = image
			}
		}
	}
}
Here we first define where the templates and the partials are, then we call the FilesProcessor to resolve the relation between the tt_content entry and the image and we assign the result to the image variable. As for the header and the bodytext, TYPO3 ships these information automatically because they belong to the tt_content table. The image belongs to the sys_file table so we have to proccess it.
The HTML
Now a minimal HTML code to just demonstrate the results: Under your_extension_key/Resources/Private/Templates/ContentElements/SimpleHeader.html
                <html xmlns:f="http://typo3.org/ns/TYPO3/CMS/Fluid/ViewHelpers"
	data-namespace-typo3-fluid="true">

	<div class="grid-container full">
		<div class="grid-x">
			<div class="cell">
				<div class="header_image" style="position: relative; margin-bottom:70px">
					<div class="blackOverlay" style="position:absolute;width:100%;height:100%; left:0;top:0;z-index:-1; background:rgba(0,0,0, .5) "></div>
					<f:image image="{image.0}" style="position:absolute;width:100%;height:100%; left:0;top:0;z-index:-2;"/>
					<div class="main_info" style="postion:relative;color:white;width:70%;margin:0 auto; padding:100px 0;">
						<h1>{data.header_title }</h1>
						<f:format.raw>{data.bodytext}</f:format.raw>
					</div>
				</div>
			</div>
		</div>
	</div>
</html>


